In facilities that demand reliable temporary power or neat fixed feeds, choosing and installing a distribution Socket Box requires attention to safety, layout, and regulatory expectations. Proper planning reduces the chance of faults and keeps crews productive during setup. This guide walks through the main steps installers and facility managers should consider when bringing a new power hub online, highlighting practical checks and deployment strategies that help avoid common pitfalls.
Begin with site planning. Identify where the unit will sit relative to foot traffic, equipment, and service access. A clear route for incoming cables and a stable mounting surface simplify wiring tasks and minimize strain on terminals. Consider nearby water sources or drainage paths and choose a location that keeps the enclosure above potential ponding. If public access is possible, select a place that allows locks and clear signage so unauthorized handling is discouraged.
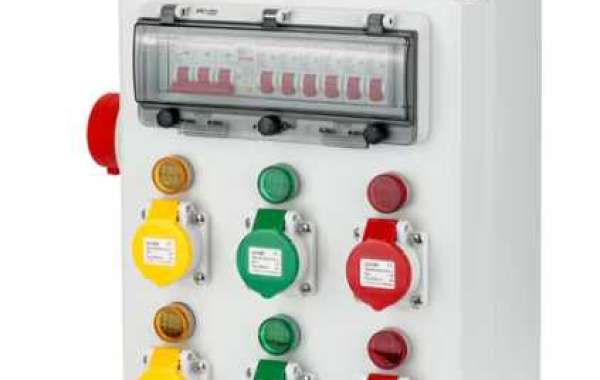
Next, match the enclosure selection to the duty. Evaluate the types of connectors required and whether mixed outlet faces or data ports are necessary. Modular frames let teams tailor the configuration and replace modules in the field without disrupting adjacent circuits. Also check mechanical ratings for impact and weather protection when units sit outdoors or in dusty areas. Choosing an enclosure with straightforward access helps technicians perform inspections quickly.
Prepare the electrical supply. Confirm upstream protection, conductor sizes, and neutral arrangements before terminating wires. Use labeled cables and color coding to prevent cross connections during installation. Good practice is to route conductors through strain reliefs and to secure them with proper clamps so motion cannot loosen terminations. For metal enclosures verify that bonding points are accessible and that the ground conductor attaches to the dedicated stud.
Mounting requires both precision and sturdiness. Secure the box with fasteners appropriate for the substrate and confirm it sits level to prevent water retention. When wall mounting, ensure anchors engage solid material; when freestanding, provide a firm base and consider seismic fastenings where local codes call for them. Double check clearances for door openings and service access so crews can reach devices without awkward positions.
Wiring the internals follows a simple order that reduces errors. Make main bus connections first, then branch protections and finally outlet terminations. Tighten terminals to manufacturer torque values and use ferrules where required to improve clamping on stranded conductors. Keep wiring neat with routed ties and maintain separation between power and control conductors. When protective devices are installed, mark their functions clearly on the door interior.
Testing is the stage where confidence builds. Before energizing, verify continuity and insulation to detect hidden faults. After power is applied, confirm that protective devices trip at the intended thresholds and that voltages at outlets match expectations. Load testing under controlled conditions helps reveal connections that warm more than others, prompting immediate retorque or replacement.
Documentation completes the process. Capture as built drawings and a commissioning checklist that records measurements and device IDs. Provide an operators sheet that explains isolation steps and safe shutdown procedures. These documents not only assist routine maintenance but also satisfy inspectors and auditors who may review installations later.
Maintenance planning prevents many field failures. Schedule periodic visual checks, torque verification for terminals, and cleaning of ventilation paths if present. Keep a modest spares kit with common modules and gasket replacements to speed repairs and reduce downtime. Training onsite staff to perform basic inspections extends the life of the installation while allowing technicians to focus on more complex tasks.
When procurement focuses on units that offer modularity, clear wiring spaces, and accessible mounting details, installation time falls and long term reliability improves. For teams seeking product data, cutouts, and accessory lists that simplify specification and field work, manufacturer resources can be very helpful. Visit www.nante.com to review distribution socket box families, accessory packs, and technical notes that support smooth selection, installation, and maintenance workflows. These materials assist both designers and field crews as they move from planning to powered operation with confidence and clarity.